
TLDR
AWS offers a free tier for many popular services like EC2, S3, RDS, and Lambda for 12 months, allowing you to use them without upfront costs or commitments. If you exceed the free tier limits, AWS automatically charges you at the standard rate, but you can set up billing alerts to stay on top of your spending. AWS also provides detailed billing reports and dashboards to monitor your usage and spending in real-time. Just review the pricing details, track your spending, and enjoy exploring AWS without worrying about costs!
Introduction
Are you considering using Amazon Web Services (AWS) for your next project, but worried about the costs? Fear not! AWS offers a free tier that allows you to explore and test out many of its services without spending a penny.
What exactly is included in the AWS free tier?
Well, quite a lot actually! You can enjoy 12 months of free access to many popular services, including Amazon EC2, Amazon S3, Amazon RDS, and Amazon Lambda, just to name a few. Within these services, you can take advantage of features such as virtual machines, storage, databases, and serverless computing, all without worrying about upfront costs or long-term commitments.
What happens if you exceed the free tier limits?
Don't worry, AWS makes it easy to calculate your potential costs before you even start using a service. Each service has its own pricing model, so it's important to review the details before diving in. AWS also provides a handy cost calculator that allows you to estimate your monthly bill based on usage, so you can stay within your budget.
If you do end up exceeding the free tier limits, AWS will automatically charge you for the excess usage at the standard rate for that service. However, you can set up billing alerts and notifications to help you stay on top of your spending and avoid any surprises.
How can you keep track of your current AWS usage and costs?
AWS provides detailed billing reports and dashboards that allow you to monitor your usage and spending in real-time. You can also set up cost allocation tags to help you track spending by project, team, or department.
How to say within budget?
Setting up an AWS budget alarm is a great way to keep track of your spending and ensure that you stay within your budget. Here are the steps to set up an AWS budget alarm:
- Log in to your AWS Management Console and go to the Billing and Cost Management Dashboard.
- Click on "Budgets" in the left-hand navigation menu.
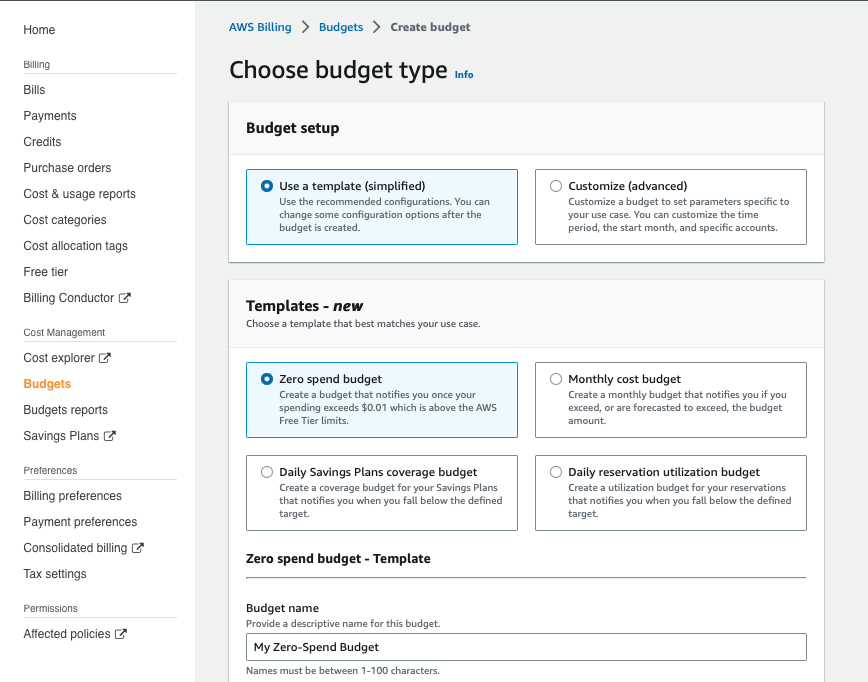
- Click on "Create a budget" and select the type of budget you want to create (e.g., Cost budget, Usage budget, Reserved Instances budget).
- Configure your budget by setting the budget amount, budget period, and budget filters (if applicable).
- Under the "Notifications" section, select "Add notification" and choose the notification type (e.g., email, SNS).
- Enter the email address or SNS topic you want to use for the notification and customize the notification settings (e.g., threshold, frequency).
- Review and confirm your budget settings.
Once you've set up your budget alarm, AWS will automatically notify you when your usage or spending reaches a certain threshold. This will help you stay on top of your spending and avoid any unexpected charges.
It's important to note that budget alarms are just one way to track your spending in AWS. You should also regularly review your billing reports and usage dashboards to ensure that you're staying within your budget and making the most of the free tier services.
For more information on setting up budget alarms in AWS, check out the official AWS documentation.
Conclusion
In conclusion, the AWS free tier is an excellent way to explore and test out the many services offered by AWS without breaking the bank. Just remember to review the pricing details, monitor your usage and spending, and set up any necessary alerts and notifications to stay within your budget. Happy exploring!